1. Work out where you're going to do this. Bathrooms are generally best because they tend to have mirrors and be reasonably easy to clean afterwards. The bigger the mirror the better, I'm currently using a mirror that is both tiny and above my eyeline which makes the process a lot harder than it needs to be. Mirrors above the sink are best as you can put the bottle down in the sink while you work on your hair (which saves getting it everywhere). The more ventilation the room has the better, I've used both a windowless bathroom with an extractor fan and a bathroom with a window, and the second is most definitely superior.
2. Prepare the area. It's a good idea to put an old sheet or something similar down to protect everything but I never bother. As long as you don't leave it sitting for too long I find that the dye wipes off tiled surfaces quite easily (both floors and walls). However, if you have carpet or wood then make sure you cover it, or are prepared to repaint. Make sure anything you would be heartbroken to get dye on is well out of the way just in case.
3. Pick your clothes with care. Old tshirts are the way to go! If you're really concerned then an old towel or sheet around your shoulders will help. Remember that unless your top has buttons you'll have to take it off over the dye. The other option is, of course, to not bother with a top but if you live with other people then that's not the best option.
4. Wait until everybody is out if you can! The chemicals in dye smell terrible and you'll be taking up the bathroom for quite a while. In addition to applying the dye (anything from 10 minutes upwards depending on the length of your hair and your skill level) and cleaning up, the rinsing takes a long while and most of the hot water.

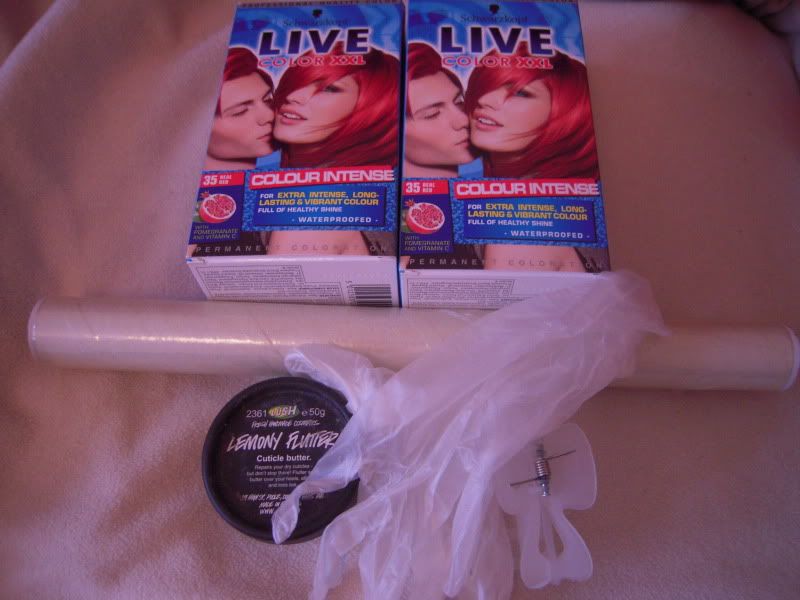
5. Two boxes of dye for long hair. Make sure that you test the dye before you use it!
6. Lemony Flutter from Lush. This is a cuticle cream but it's also great for putting around the hairline to prevent your face being stained by the dye. Just make sure you don't get any on your hair unless you want random patches of natural colour.
7. Clingfilm. Trust me on this one! Once you've finished dying your hair wrap it in clingfilm. This keeps it out of the way and off your back so that you can spend the developing time doing other things without worrying about staining everything.
8. Hair clips. Separating out your hair makes it easier to get everything covered with the dye. I like to put my hair into bunches so that I can use one box on each side but using layers is also a good option.
9. Gloves. Most dyes do come with gloves but I find them much too big and too stiff to be really useful. Supermarkets sell lab-type gloves in latex and latex free versions which are much better. The only thing is that they don't cover quite as far up the wrist so you might end up with orange arms!
10.Condition, condition, condition. Whilst washing the dye out consider conditioning more than once. I do the first condition around halfway through then continue to rinse and condition again at the end. Dye isn't good for your hair and the more protection you can give it the better.
This isn't an exhaustive list and I'm sure I've forgotten something! Anyone else got any handy ideas to make home hair dying as easy as possible?
No comments:
Post a Comment